 Mon-Sat 9AM-6PM
 Make an
Appointment (818) 640-2944
Make an
Appointment (818) 640-2944 2115 W Magnolia Blvd Unit C, Burbank, CA 91506
Water Around a Wall Base After a Plumbing Leak: What to Document First
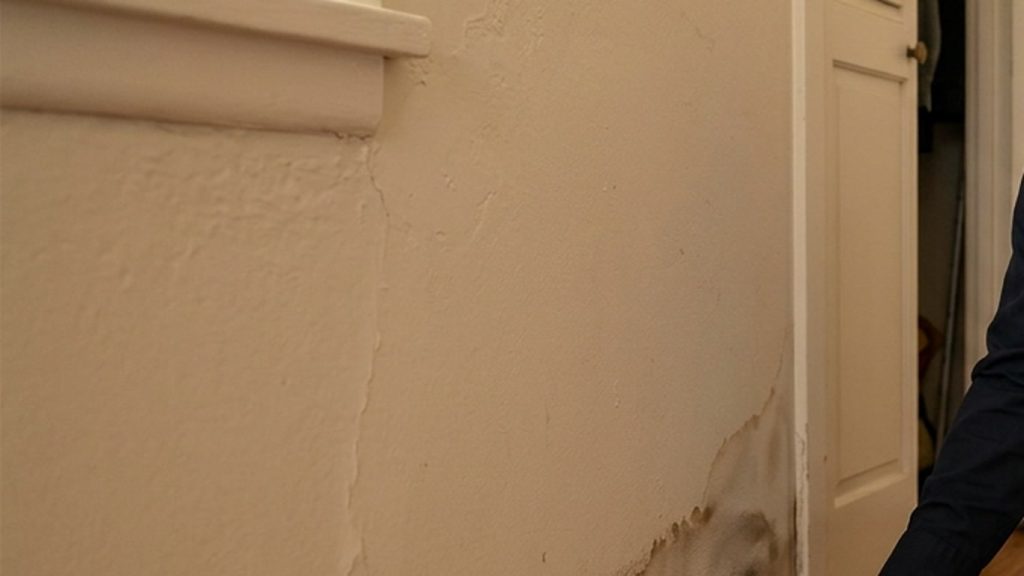
Water around the base of a wall after a plumbing leak is easy to underestimate. Sometimes it is just surface moisture from a recent spill or cleanup. Other times, water has moved behind the baseboard, under flooring, or into drywall where it can keep causing damage after the visible leak is stopped.
The fast answer: stop the water source if you can do so safely, keep people away from wet electrical areas, take clear photos before moving too much, and document where the water appeared first. If the wall, baseboard, or flooring stays damp, it is time to have the area checked before covering it back up or assuming it dried on its own.
First, make sure the leak is actually stopped
Before documenting damage, confirm the plumbing problem is no longer actively adding water. If the leak is from a sink supply line, toilet connection, appliance hose, water heater, or exposed pipe, shut off the closest valve if it is safe and easy to reach. If you cannot identify the source, or water is spreading quickly, use the main shut-off valve if you know where it is.
Do not open walls, pull flooring, or start demolition just to investigate. That can create more damage and may remove clues a plumber or restoration technician needs to see. Your job in the first few minutes is simple: slow the water, avoid unsafe areas, and preserve what you can see.
What to document before cleanup goes too far
Good documentation helps you explain what happened, compare whether moisture is spreading, and give a plumber or restoration team a clearer starting point. You do not need professional equipment for the first pass. A phone camera and a few notes are enough.
- Take wide photos of the room so the wall, floor, doorways, and nearby fixtures are visible.
- Take close-up photos of the wet baseboard, wall paint, flooring seams, cabinet toe-kicks, and any bubbling or staining.
- Note the time you first saw the water and when the plumbing source was shut off.
- Write down what was running nearby: sink, toilet, shower, dishwasher, washing machine, water heater, or irrigation line.
- Mark the farthest visible edge of the water with painter’s tape if you have it, then check later to see if the damp area grows.
If you use towels, take photos first. It is fine to remove standing water from hard surfaces, but try not to erase every clue before anyone has seen where the water traveled.
Why water shows up at the wall base
Water does not always appear directly under the broken part. It follows gravity, framing, flooring seams, cabinet bases, and tiny gaps behind trim. That is why a leak under a sink may show up along a nearby baseboard, or a supply line problem may leave water at the bottom of a wall before you ever see a drip.
In many Burbank and Los Angeles-area homes, older flooring layers, tight bathrooms, slab foundations, and remodeled kitchens can hide the path water takes. A wall base can look like the first damaged area even when the source is several feet away. That is also why guessing from the stain alone is risky. A plumber may need to trace the source before anyone can say whether it was a fixture connection, drain line, supply line, appliance hose, or another issue.
Signs the wall or floor may still be holding moisture
After the visible water is removed, keep watching the area. Some materials dry quickly on the surface while staying damp behind the trim or underneath. These signs do not prove hidden damage by themselves, but they are worth taking seriously:
- baseboards that swell, separate from the wall, or feel soft
- paint bubbling, peeling, or forming a line near the floor
- flooring seams lifting or edges curling
- a musty odor that was not there before
- new stains that appear after the cleanup
- water returning after the area was dried with towels
- drywall that feels soft, crumbly, or colder than surrounding areas
Avoid declaring the area “fine” based only on how it looks from across the room. If the leak reached drywall, baseboards, cabinets, or flooring, the concern is what is happening behind and underneath the finished surfaces.
What homeowners can safely do right away
There are a few safe steps that can help limit damage while you wait for professional help or decide what to do next. Remove standing water from hard surfaces. Move rugs, cardboard boxes, and small furniture away from the wet wall if they are safe to lift. Open interior doors for airflow. If you use fans, keep them away from standing water and electrical hazards.
Do not use heat guns, space heaters, or aggressive drying methods near wet materials. Do not remove large sections of drywall or flooring without a clear plan. And if water is near outlets, electrical panels, appliances, or ceiling fixtures below the leak, keep your distance and get help. Plumbing leaks can become electrical-adjacent problems quickly when water travels through walls or floors.
When it is time to call for plumbing or restoration help
Call for help when the source is not obvious, the leak keeps returning, water has reached drywall or flooring, or the damp area is bigger than a quick surface cleanup. A plumber can help identify and stop the source. A restoration-focused inspection can help decide whether the surrounding materials need drying, removal, or closer monitoring.
For Burbank homeowners dealing with moisture at the base of a wall, Zenon’s Burbank water damage restoration service is the right next step when a plumbing leak may have affected drywall, flooring, or trim. The goal is not to scare you into tearing things out. The goal is to confirm what got wet, stop the damage from spreading, and avoid covering up a problem that is still active.
Local trust matters after a leak
Leaks in Burbank homes can be frustrating because the visible water is often only part of the story. Older plumbing, tight crawl spaces, slab construction, apartment-style layouts, and remodel layers can make moisture hard to trace. A local team that regularly works with plumbing leaks, drain issues, and water damage conditions in the Los Angeles area can usually ask better first questions and look in the right places faster.
When you call, be ready to explain where the water appeared, what plumbing fixture or appliance was being used, whether the area is still damp, and what you already photographed. That makes the first conversation more useful and helps the visit start with the most likely source instead of guesswork.
Simple checklist before the visit
- Save your photos and notes in one folder on your phone.
- Keep towels or moved items available if they show how much water was present.
- Do not repaint, caulk, or cover the baseboard until the area has been checked.
- Keep children and pets away from damp drywall, loose flooring, or wet electrical areas.
- Check the same wall base again after 30 minutes and a few hours to see if moisture returns.
A little documentation up front can prevent a lot of confusion later. It helps separate a small surface cleanup from a leak that may have moved into materials you cannot see.
Zenon Plumbing & Restoration
If water is showing up around a wall base after a plumbing leak, document the area, avoid unsafe electrical-adjacent spots, and request help before the damage spreads. Phone answered 24/7, on-site Mon-Sat 9 AM–6 PM. Contact Zenon Plumbing & Restoration.


